How To Aim Headlights on your Motorcycle, Jeep, or Truck
October 04 2021
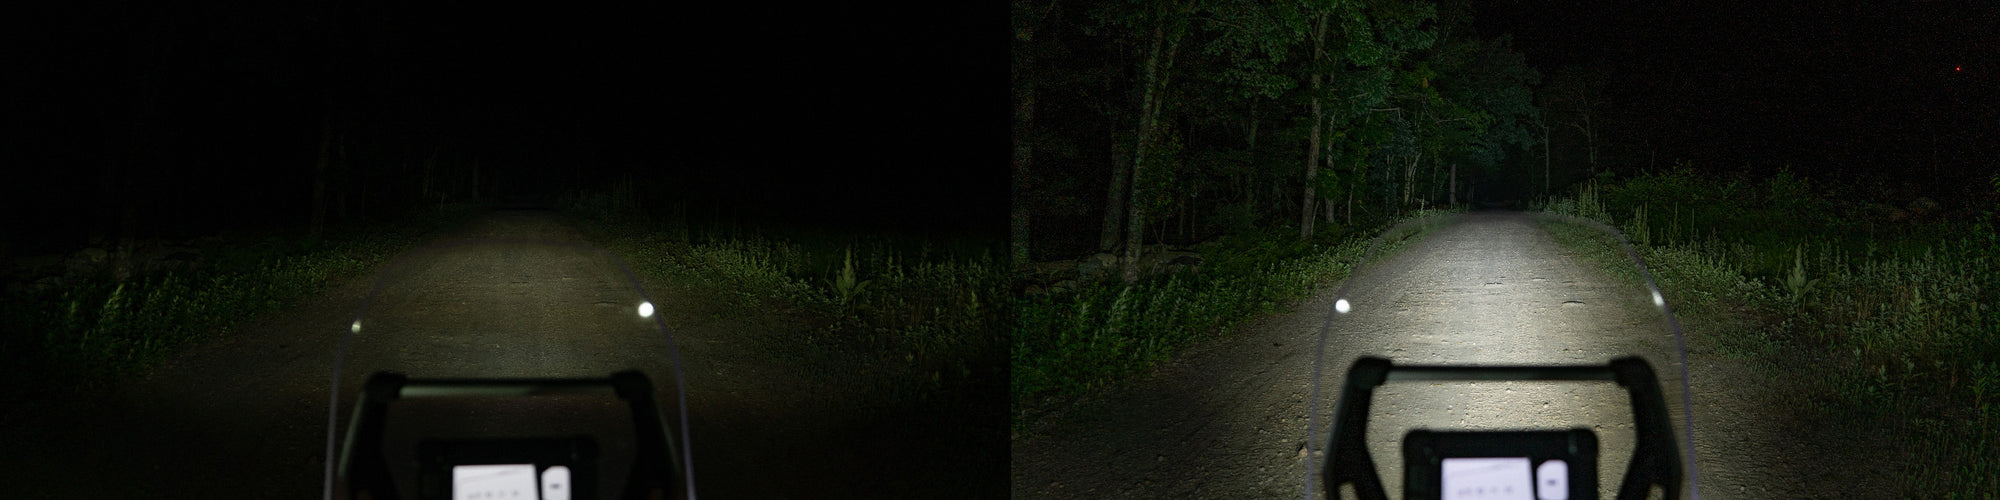
Installing auxiliary LED lights is easy, but the job isn’t finished until they’re pointed in the right direction. We show you how to fine tune your lights for best performance.
You’ve installed DENALI accessory LED lighting to your vehicle for added visibility and peace of mind while driving. That’s great! But you’re not done yet. You still need to aim those lights to gain the optimal light projection down the road, or the trail. Also, you wouldn’t want to be that guy who blinds other motorists on the road with misaligned lights. We all need to share the road. Blinding other motorists, even unintentionally, is dangerous because it could potentially cause an accident. Worse yet, it could cause someone to have an accident with you! Admit it, you'd hate to be blinded by someone who didn't have his lights properly aimed. But it's easy to avoid by using the procedure in this guide. Let's walk through some general rules of thumb to aim your new lights.

Before You Aim Your New LED Lights
It probably goes without saying, but this procedure should be done out of direct sunlight. A covered parking garage will work, or wait until dusk. No matter what type of vehicle you’re working on, ATV, UTV, motorcycle, or automobile/truck, you’ll need to park it on flat, level ground pointing at a plain vertical wall. The vehicle needs to be perpendicular to that surface. Some folks use a garage door. Park the vehicle 25 feet from the wall. The vehicle needs to be level and equipped as it will normally be used. Tire pressures should be proper all the way around, full tank of gas, and no extra cargo weighing down the rear. If you are aiming lights on a motorcycle, a wheel chock can hold the bike vertically, but you really should have a rider sitting on board the bike to get the proper ride height while making adjustments.
Measure from the center of the light lens being aimed to the ground, and stick a length of masking tape on the wall horizontally at a measurement 2 inches lower than the centerline of the light lens. Stick a short length of tape vertically on the wall, intersecting the horizontal tape, at a point which would be the centerline of the vehicle. If you’re aiming lights on a motorcycle, the mass of light will be aimed right around that centerline, but if you are working on a ATV, UTV, or automobile/truck, you’ll also need to place short lengths of vertical tape to the left and right of the centerline, directly in front of each headlight. Measure the distance from the center of the grille to the center of each headlight (or total distance between headlights, divided by two), and place tape on the wall vertically at those two points as well.

Adjusting Your Truck and Auto Lights
Automobile headlight adjusters are often visible from the front as small Phillipshead screws located at 12 o’clock, 3 o’clock, 6 o’clock, or 9 o’clock. 12 and 6 o’clock would adjust vertically, and 3 and 9 o’clock would adjust side-to-side.
To adjust the vertical aim, slowly turn the appropriate screw in or out to align the top of the most intense part of the beam at or just below the centerline of your horizontal tapeline.
Next, adjust the side-to-side aim. The most intense part of the beam should be just slightly to the right of the short vertical tape in front of the headlights. (For the USA, we drive on the right side of the road. Other countries with left side of roadway use, aim slightly left) Aiming the lights in this slight offset direction ensures you won’t blind oncoming traffic. Repeat the procedure on the other headlight.


Adjusting Motorcycle Lights
When adjusting a headlight on a motorcycle, have someone sitting on the bike and holding it upright. Adjust vertical and horizontal aim similarly to the automobile instructions above.

If you are adjusting DENALI driving lights, adjustment will be via the U-type saddle bracket. Loosen the mounting and hinge bolts slightly, retain some tension, so you can just move the light without it completely flopping down. Then aim each light so that the center of the hot spot aligns with the tape line on the wall. The lights should be aimed equidistant left and right from the center line of the vehicle. Once final adjustments are made to the lights, tighten the mounting and hinge bolts.
When adjusting DENALI fog lights, the horizontal tape line should be 4 inches lower than the distance from lens to ground.

These instructions are for general use. Some vehicle manufacturers specify different distances from the wall for headlight alignment. It is best to consult your vehicle shop manual for exact specifications. Also, some municipalities have established specifications as well, check your local laws.